We take the climate control system of our cars for granted until they start malfunctioning. There’s a chance that once you’ve discovered the problem, it’s too late to fix it. But don’t fret; if you’re facing blend door actuator issues, we can help you solve them and take steps to avoid them in the future.
The best way to fix a faulty blend door actuator is to have it replaced or looked at by an auto-mechanic. Since blend door actuators are such a finicky device, it’s hard to say what exactly caused the issue, as it could be a result of many different reasons.
But first, let’s learn what a blend door actuator is.
What Is A Blend Door Actuator?
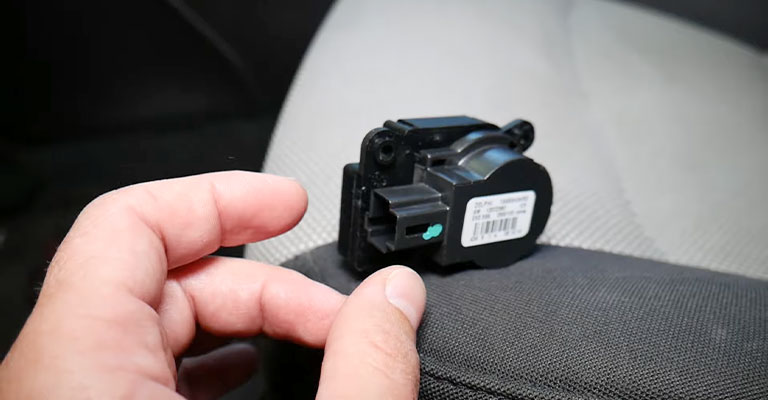
Simply put, the blend door actuator is a small device that is located under the trim panel of your car’s dashboard. It is the central mechanism of your vehicle’s climate control system and is responsible for either circulating warm or cool air to the inside of your vehicle for the comfort of the passengers.
However, since it is a vital part of your car’s climate control system, there is more you should know about the blend door actuator.
A typical climate control air management system controls the airflow to the passenger compartment. It is made up of a series of plastic cases, including the AC evaporator core, the blower motor, and the heater core.
The system also has three main doors: the inlet door, the mode door, and the blend door. Inlet doors regulate the fresh air that circulates through the system, and the mode doors control whether the air is discharged through the floor or panel.
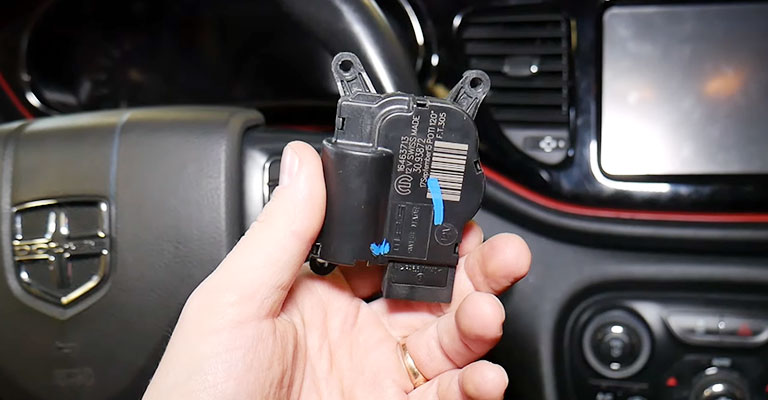
Then there’s the blend door. It is an electric HVAC motor that works along with the sensors of your car’s climate control system.
When someone turns the temperature dial up or down and adjusts the actuator’s airflow intensity, signals are sent to the actuator. In response, the actuator relays the signal to send the air through either the floor vents, mid-vents, defrosters, or other air vents.
In new car models, there is a dual-blend door actuator. This actuator has a feature that lets users set different climate settings in the front seats and back seats of the car separately.
Symptoms And Causes of A Bad Blend Door Actuator
Sometimes, blend door actuators can malfunction, which can be caused by a number of reasons. But, you need to know whether the issue you’re facing is a sign of a faulty actuator.
Since other car problems can give the same signs of a bad blend door actuator, it’s important to perform a thorough inspection. Here’s how to tell which blend door actuator is bad –
Knocking Sounds
One of the most common signs of a bad blend door actuator is knocking sounds coming from under the dashboard. You will notice these sounds as soon as you turn on your HVAC system or start your car. If this is the case, you might want to look into getting your blend door actuator replaced.
Clicking Sounds
Do you hear strange clicking noises coming out of your glove box? This can be another telltale sign of a faulty blend door actuator. It could be a muted tone or a loud, almost clanking sound, but it will be constant.
These noises are located close to the control dials of your HVAC system and only start when you turn on your AC or climate control system. Sometimes, adjusting the climate control dial can fix the issue for some time. But it may start again and cause other problems, so it’s best to replace the blend door actuator.
Unusual Sounds
Tapping, squeaking, droning, and other strange noises can be a link to a bad blend door actuator. If any of these sounds are coming from your glove box, near the dashboard, or around the HVAC control knobs, it’s most likely a sign of your blend door actuator malfunctioning.
These unusual sounds can get louder with time, when you adjust your climate control settings or when you turn on the A/C. However, these noises could also be attributed to another issue, so consult an expert before replacing any parts.
Irregular Temperature
When you notice the airflow of your vents switching between different temperature settings, it could be an issue linked to your blend door actuator. You will notice this when the temperature suddenly changes without you adjusting the controls.
Irregular Airflow
Sometimes, the air coming out from the different vents of your car is not consistent. This happens when the airflow suddenly stops or turns on, or the blend door itself moves in an oscillatory motion and diverts the airflow. If this is the case, check your blend door actuator as soon as possible.
Wrong Temperature
In extreme cases, you might experience your vents giving out a completely wrong temperature from the one you set.
Adjust the dials so that the vents are blasting hot or cold air. If your blend door actuator is normal, the air should be the exact temperature you have set. However, with a broken blend door actuator, your vents will blast the opposite temperature.
Different Temperatures in Vents
Although this is rare, sometimes you will notice the different vents of your car giving out separate temperatures. This is not to be confused with a dual blend door actuator, which is present in modern models of cars and is designed to provide split temperatures to different vehicle compartments.
In typical blend door actuator systems, if you notice one vent outlet temperature is different from the other, have it checked by a professional.
How to Fix A Blend Door Actuator
The only way to fix a faulty blend door actuator is to replace it completely, as the existing problems might resurface in the future. This is how to replace a blend door actuator by yourself –
Step 1 – Remove Any Electrical Connections
Disconnect all battery cables from your vehicle. As you will be working with the electrical parts of your car, it’s crucial that you remove the connections, so there’s no risk of electrocution.
Step 2 – Detach The Glove Box
Pull out the glove box all the way, then pull it upwards to detach it from its place. As soon as the glove box is out, take out all of its contents and set them aside for the time being.
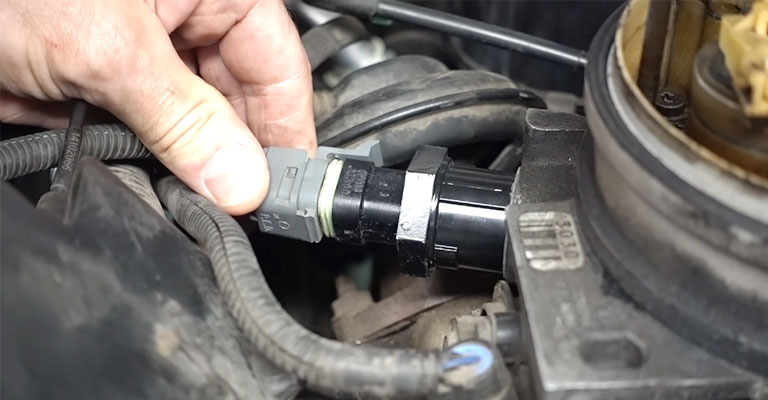
Step 3 – Unplug Wiring Harness
Near the heater core, there’s a wiring harness located behind the place where the glove box was. You will notice it being held in place with a plastic clip. Unplug the wiring harness carefully by pulling out the clip.
Step 4 – Remove Air Filter Assembly
Now, you will need to remove the air filter assembly. You can do this by unscrewing the two screws holding it in place. Below it, you will spot a black plastic piece covering this glove box compartment section. It is held together with bolts, so remove all of them and then pull out the plastic piece.
Step 5 – Remove The HVAC
You will now be able to see a 6 by 3-inch area in place of where the glove box was. This has the letters HVAC plastered on it, which is held in place with about six bolts.
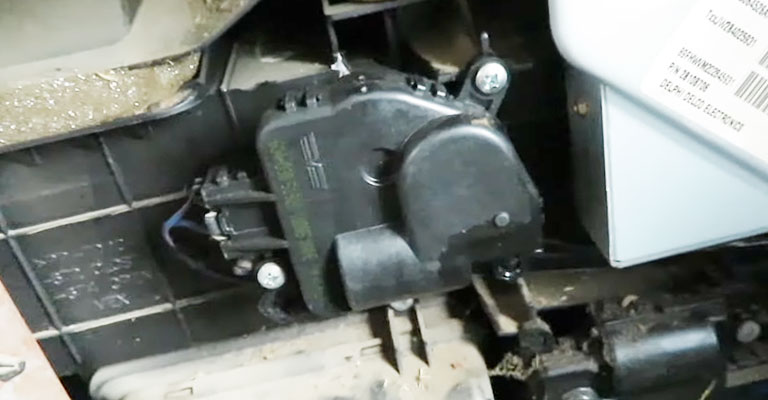
Take out all these bolts and carefully pull out the HVAC from the main assembly. You should be able to see the blend door actuator now.
Step 6 – Removing Retaining Clips
When you pull out the HVAC, you should also detach the black plastic sleeve by popping off the retaining clips with a flat-end screwdriver. Again, be very cautious so these clips aren’t damaged, or they could cause permanent damage to your A/C system. The sleeve should come off now.
Step 7 – Remove Blend Door Actuator
Now that the sleeve is off, you can clearly spot the blend door actuator. Its dimensions are 6 by 3 inches, and it is mounted with hex head bolts on its side.
You will see two bolts around the blend door actuator. Remove them carefully and draw them out by pulling them outwards. Make sure to also detach any other wiring harnesses holding the part in place.
Be very cautious so there’s no damage to the surrounding parts.
Step 8 – Replace with New Blend Door Actuator
Finally, replace the old blend door actuator with a new one. From here, you will need to work your way backward. So, replace all the bolts and put the retaining parts back into their places. Remember to also reattach the battery cables at the end.
If you are confused about a specific step or you would like to follow a visual tutorial of this process, check out this video for more details.
Frequently Asked Questions
- Why does a blend door actuator fail?
Burnt-out circuits, obstructions in the blend door, worn-out teeth on the plastic gears, etc., are some of the causes that result in a blend door actuator failing. However, these are hard to identify and need a proper inspection by an expert.
- How much does it cost to get a blend door actuator fixed?
Getting an HVAC blend door actuator replaced can cost anywhere between $320 to $380. However, if you insist on getting it fixed or inspected, it might lower the average costs to around $190 to $240. You can also purchase separate parts of the HVAC system at different prices.
- How to reset a blend door actuator?
First, you have to remove the actuator from its place, then turn on the maximum heat setting on your climate control system. Now, turn the blend door shaft so that the vents blast the maximum heat, then reinstall the actuator.
Finally, you should turn on the A/C and test the blend door actuators before putting everything back into its place.
- Can I unplug the blend door actuator?
Yes, you can unplug your blend door actuator. This is achieved by detaching all wiring harnesses that power the blend door actuator. However, this will prohibit the doors that allow air into the cabin from opening and closing. Instead, they will be stuck in their default position.
- Why is my car blowing hot air on one side and cold air on the other?
If you have a dual-blend door actuator system in your car, this is nothing to worry about. It is probably just the feature channeling split temperatures into different sections of the car.
However, if you do not have this feature, it could be a sign of a faulty blend door actuator that needs replacement.
Conclusion
That brings us to an end to our information on the blend door actuator. We hope we were able to familiarize you with this often overlooked device that plays such an important role in our vehicles.
Hopefully, through our article, you were able to acquire the knowledge to inspect a faulty blend door actuator, know how to replace it, and what to do when it malfunctions. Don’t forget to check out our FAQs section to clear out any remaining queries.
Leave a Reply