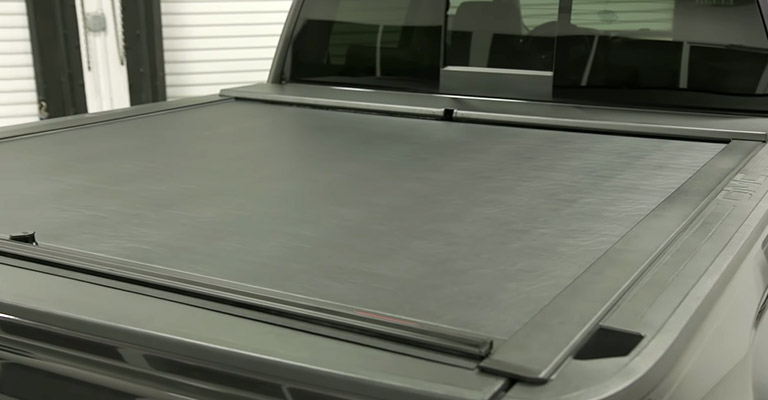
Roll n Lock covers come with all sorts of parts that need to be assembled. Installing the housing brackets & securing the tracks are the important parts. But you need to make sure that everything is aligned & secured.
Can You Install a Roll N Lock Tonneau Cover With a Bed Liner?
Yes, it is possible to install a roll n lock tonneau cover with a bed liner. Your bed liner may need some trimming if it is not aligned with the cover. Most spray-in bed liners pose no installing problems.
How to Install Roll N Lock Tonneau Cover
Step 1: Remove the Tie Downs
You must remove all the factory tie-downs on each side at the front of the bed. Using a flat head screwdriver is appropriate to remove the tie downs. No need to interfere with the rear side of the tie-downs.
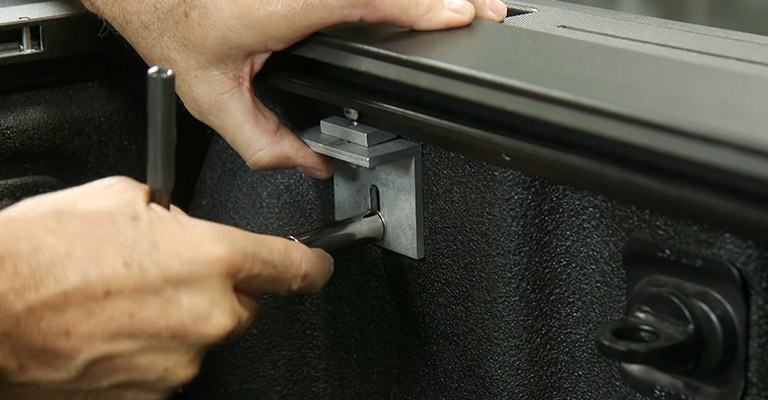
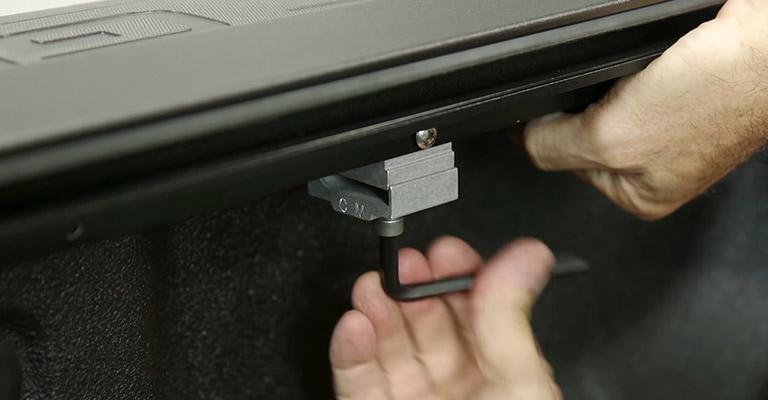
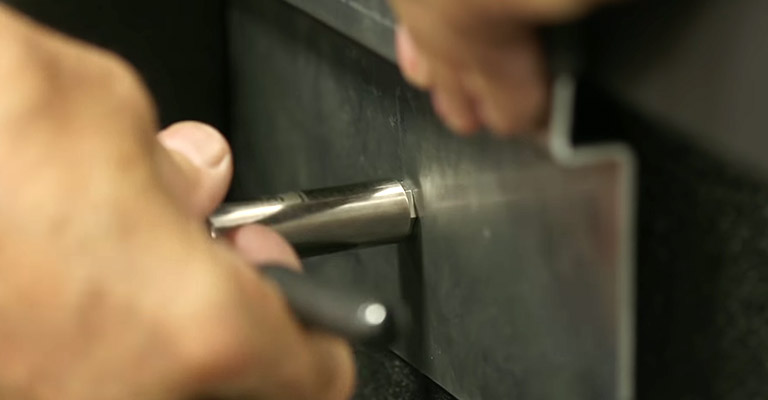
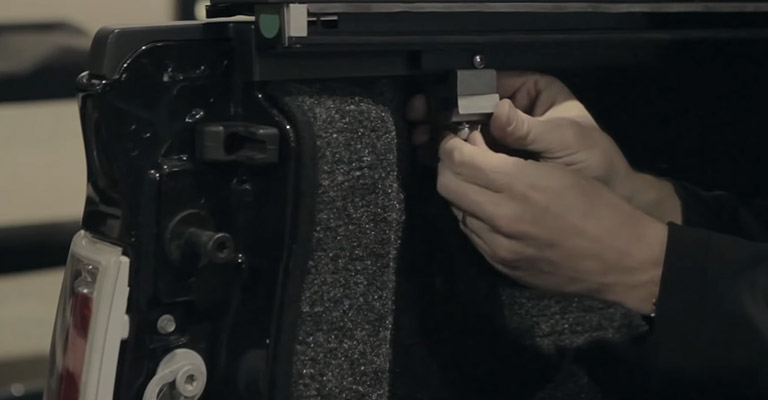
Step 2: Locking the Housing Support
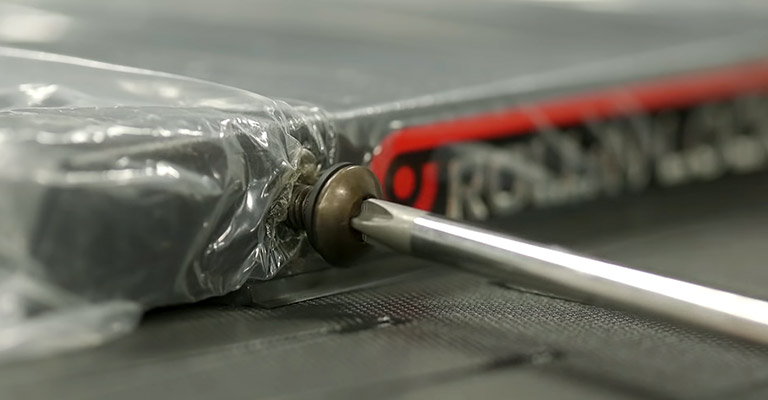
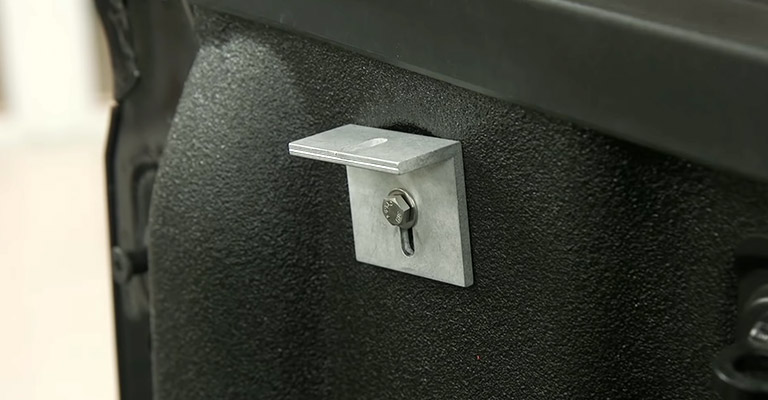
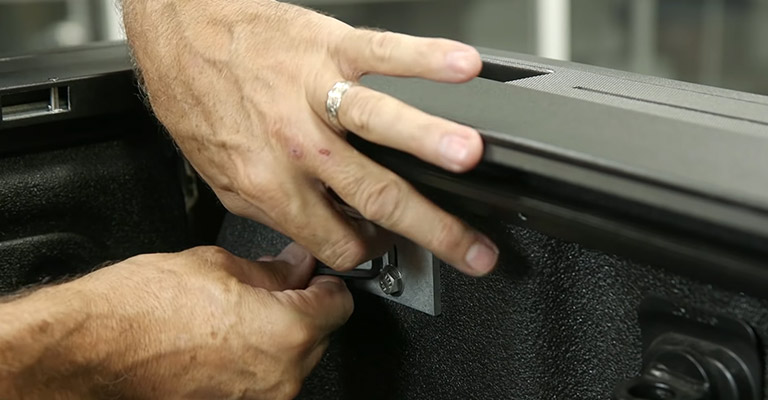
Next, you need to install the housing support brackets. These will provide extra support to the roll n lock while it’s on the bed ribs. Look for the 1 inch bolt in the packet.
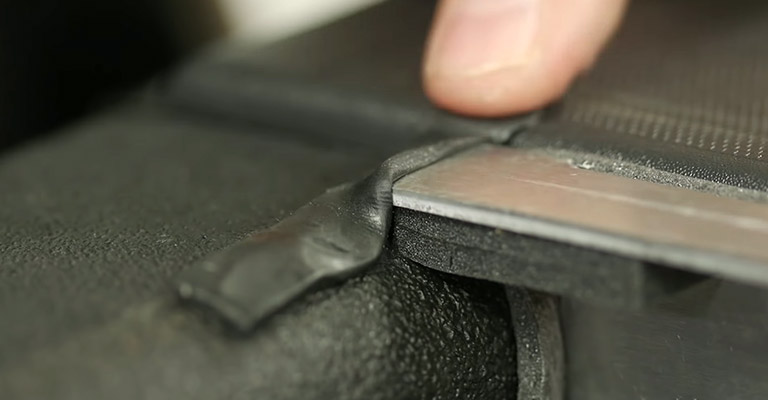
Insert the bolt in the housing support bracket & attach the plastic washers too. Then insert the pointed end of the support bracket in the tie-down bed hole from step 1. Mold the housing strips so that no water can penetrate them.
Step 3: Positioning the Housing
Position the roll n lock housing exactly at the center of the bed. Double-check each end to make sure it’s aligned.
Step 4: Screwing the Lid
Upon removing the Philips head screws, the lid can slide towards the bulkhead. The screws are at each side of the lid.
Step 5: Assembling the Additional Parts
Collect the CB track brackets, tangs & washers from the hardware pack. Assemble the parts with ease. Then insert the assembled track bracket into the bed hole, closest to the tailgate.
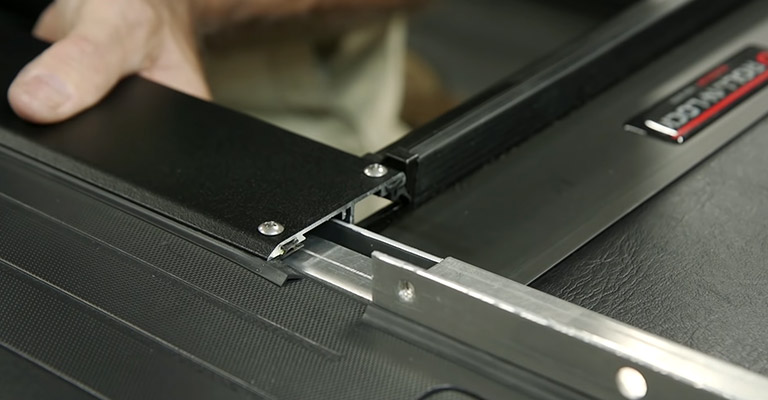
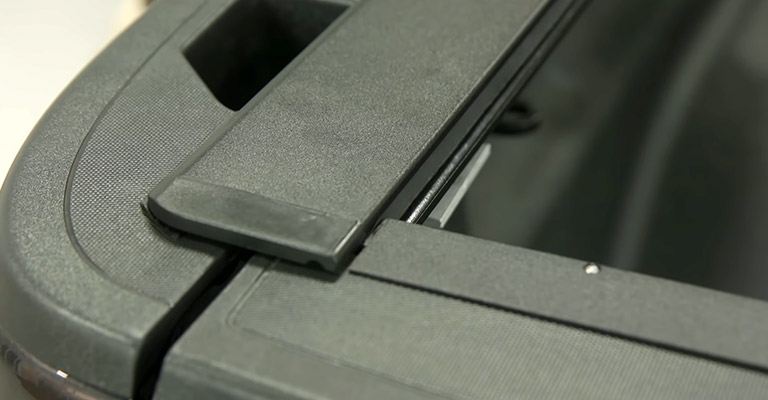
Step 6: Aligning the Track Perfectly
You need to ensure that the pull strap is to the front of the housing. Rotating the lock clockwise will enable you to release the latches. Slide each track into position. Make sure they are in alignment.
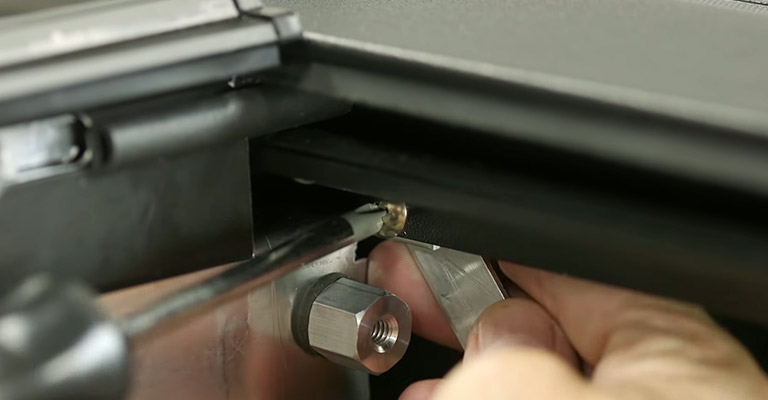
Step 7: Securing the track
Secure the track by threading the screw through the pre-punched holes. This will go completely into the cargo nut.
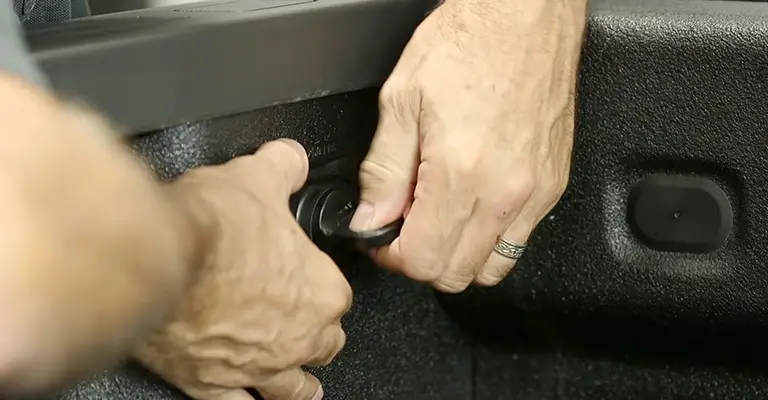
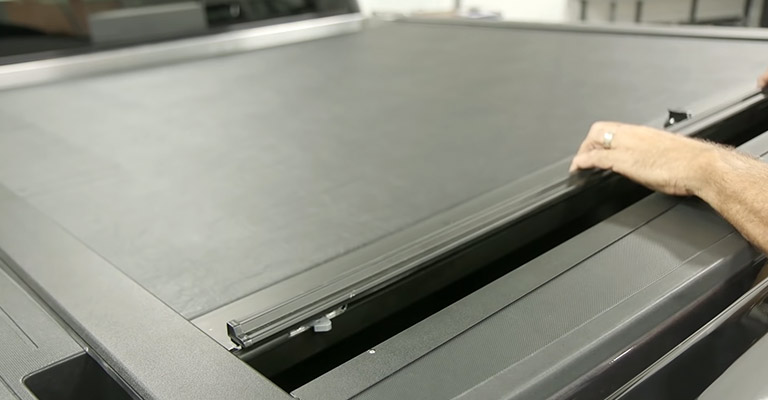
Step 8: Attaching the Bed Clips
Attach each of the bed clips loosely. This is important for the next steps. You may have four or 6-bed clips depending on your model. Tighten them at the end of positioning.
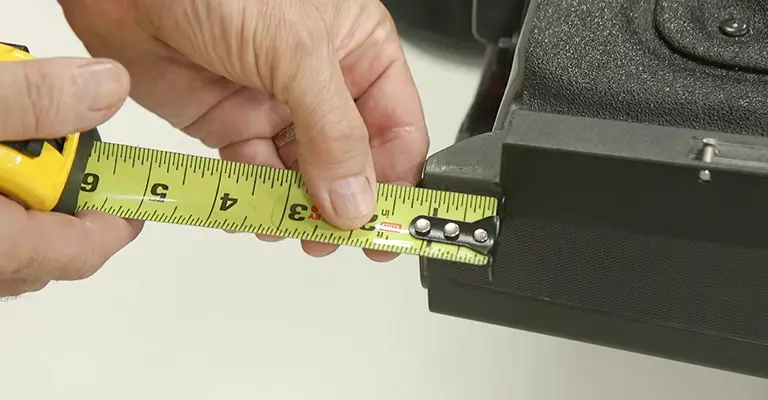
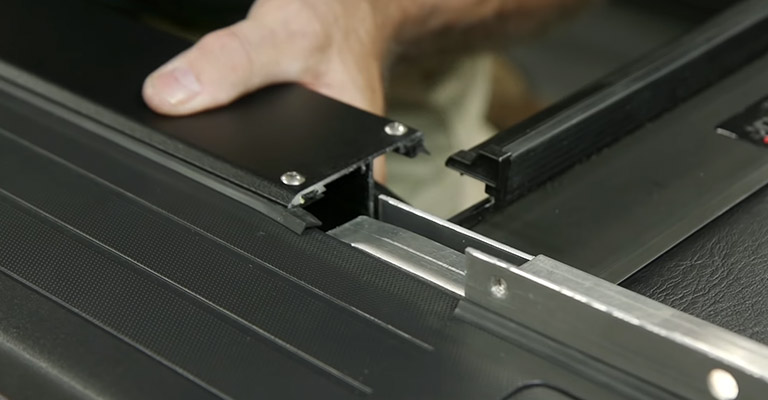
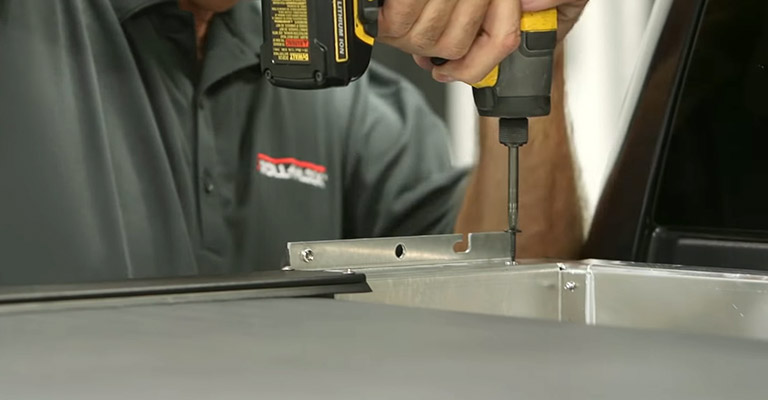
Step 9: Installing the Tailgate Extrusion
Next, we have to install the tailgate extrusion—this where you need to be careful. You may need to trim it to clear the tailgate extrusion. After you have trimmed it properly, place the tailgate extrusion in it.
Measure if it’s placed exactly in the center on the tailgate. Then you need to check if the tailgate extrusion is in level with the top surface of the tailgate. Attach it with the self-tapping screws into the pre-punched holes. They are at the bottom of the tailgate extrusion.
Step 10: Checking the Alignment
Now you need to check whether the tracks are in alignment with the housing. Then tighten the clamps if everything okay. Adjust the unit to make sure everything is in place. They were adjusting the whole tracks so that they are aligning the tailgate. This is crucial for ensuring proper operation.
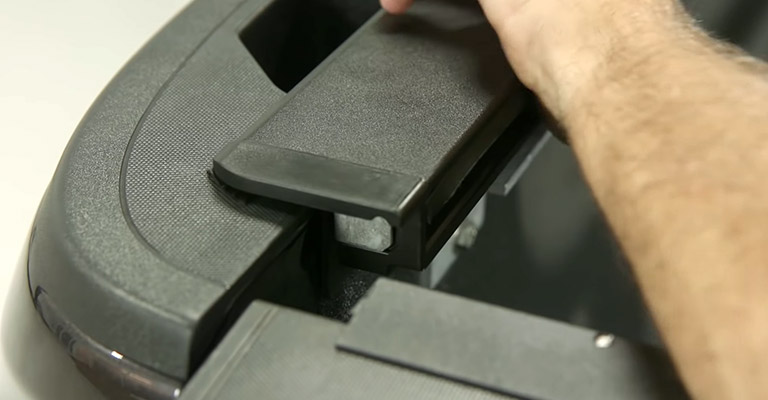
Step 11: Making Sure Everything is perfect
Tighten the clamps so that they sit level to the bedrails. Make sure they are not loose at all. Check if everything is okay with the whole setup. Seeing every screw & clamp is important.
Step 12: Installing back the Self Tapping Screws
Install the remaining self-tapping screws through the flat surface of the housing. This marks sure the housing stays level. Check if the cover unlatches & retracts. If you experience trouble with the cover, this is due to improper alignment.
Reinstall the lid & lid screws of the housing. Next, install the cargo bumper in front of the housing.
Step 13: Checking Before Operating
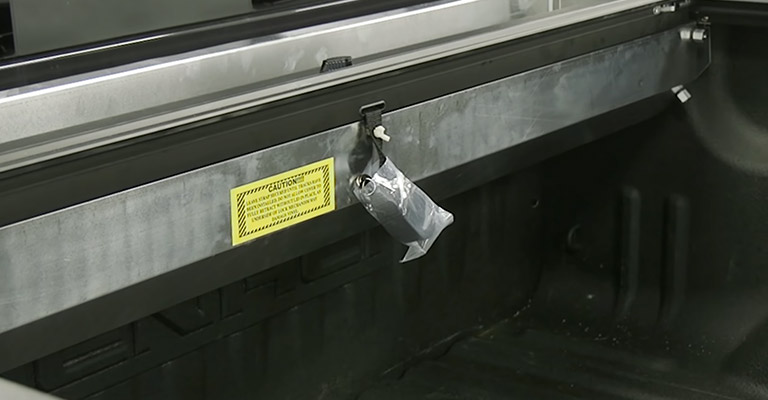
Secure the pull strap to the interior of the truck. Retract the cover several times to check if it’s operating. You are all good to go if this part checks out.
Roll n-lock Installation f150
When it comes to pick-up trucks, the Ford f150 has been America’s 1st choice. Like the f150, you can install the roll n lock tonneau cover step by step in the previous section. It is no different for a Chevy Silverado or a sierra, or an f150.
Roll N Lock Torsion Spring Adjustment
There is a torsion spring that is in the roll n lock cover. They are present to give a frictionless rotation. You will have a more effortless & smooth operation every time you open or close it. The torsion spring is in a 3” aluminum casing.
Roll N Lock Bed Cover Problems
Stuck Roll N Lock Bed Cover
Sometimes you might find the bed cover stuck. This problem may arise if you haven’t aligned the tracks. Aligning everything is one of the key factors that ensure the proper operation of the cover.
Bed Cover Shakes
This problem occurs if the latches are loose. Check every screw & clamp to ensure that they are tight. Don’t over-tight them!
FAQ
Q: What tools do we need to install a tonneau cover?
Ans: You will be needing a medium flat blade & Philips head screwdriver. For a socket, you need a 7/16 wrench or socket. A measuring tape to measure the positions. A power drill bit to install the self-tapping screws.
Q: What to do if there is still water leaking?
Ans: You have to find the spots from where the water is leaking. You may do this by spraying a garden hose on it. When you can locate the faulty area you can take measures to fix the leakage.
Conclusion
It’s not all beds of roses while you are trying to install a roll n lock tonneau cover. Sometimes you might be hard stuck at it. Trying in these situations might even damage the cover. Don’t hesitate to call in a professional for a helping hand. It stalled loosely. Check every screw & clamp to ensure that they are installed. Don’t over screw them!
Leave a Reply