Nissan’s windshield wiper fluid tank has a reputation of cracking. If your luck’s that cracked, you might be facing that issue. In this particular case, there’s usually a windshield wiper fluid puddle on the ground. Or you might be facing some other issues, who knows.
But nevertheless, it’s a very safe and intuitive process and with absolutely zero chance of damaging any components. So, here’s a step by step guide on this.
Steps to Remove Windshield Wiper Fluid Tank Nissan Frontier
In Nissan Frontier, the windshield wiper fluid tank resides under the hood and protected tightly by the wheel coverings. You may find it difficult if you try to dismount the tank directly. But a step-by-step approach can make the task easy. That’s why we have separated this task into several segments. Hop on!
Configure the Vehicle for Operation
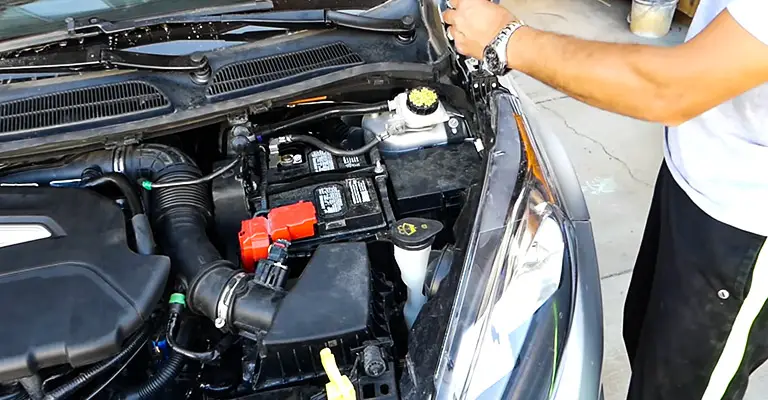
At the very beginning, you need to make a few settings to prepare your vehicle. Also at this stage, you need to take precautions for yourself. A smooth hand-gloves is required to protect you from dirt, rust, or any debris hanging deep inside the chassis. We recommend cleaning the surrounding area for a smoother operation.
Keep the Computer Settings Protected
If you want to keep the cruise controls alive even after you cut the battery, you need to insert an external power source. The best way to do that is to insert a nine-volt cigarette lighter. This process enables you to bypass all the hassle of configuring the computer again.
Cut All-Electric Power
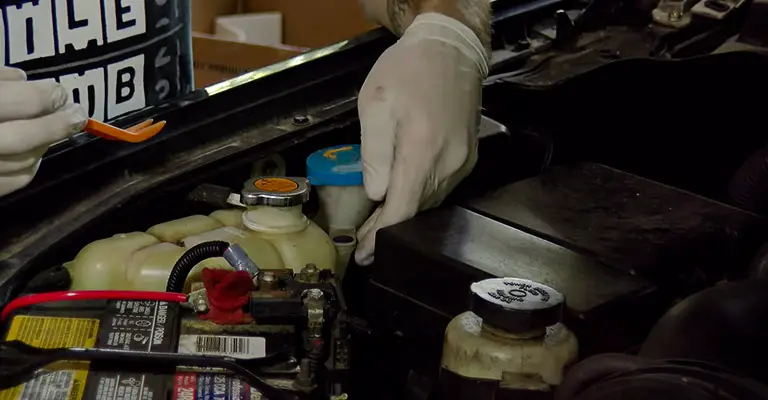
You must cut all the power from your vehicle to prevent any spark or similar accident during the process. For this, you need to disconnect the battery which rests under the hood. Simply take the cable attached to the negative terminal off.
You need to consider a few things before dealing with the battery. If you notice any white particle on top of the battery cap, don’t touch that area by bare hand. That is acidic water coming out from the aging battery. You need to wash that area with a wet cloth, better shoved into baking powder solution, to prevent burning.
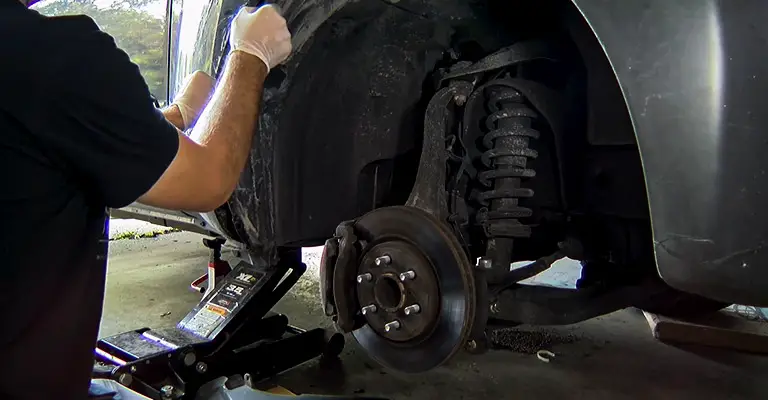
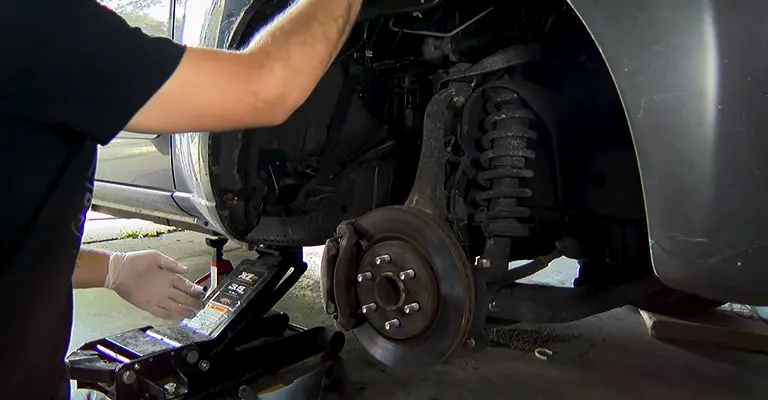
Remove the Wheel and Interior Wheel Wall
As the tank is near the front section of your vehicle, you need to reach it from the forward wheel section. In the case of Frontier, the tank is located at the rear of the front right wheel. To get access, you need to remove that wheel and also the protective wheel wall.
After removing the wheel completely, you can just follow the screw line and remove them one by one. Then pull the entire wheel wall out. But do remove the mudguard before you even start to remove the screws from the wheel wall. You should remove the dirt and water from the upper section of the mudguard to prevent rusting.
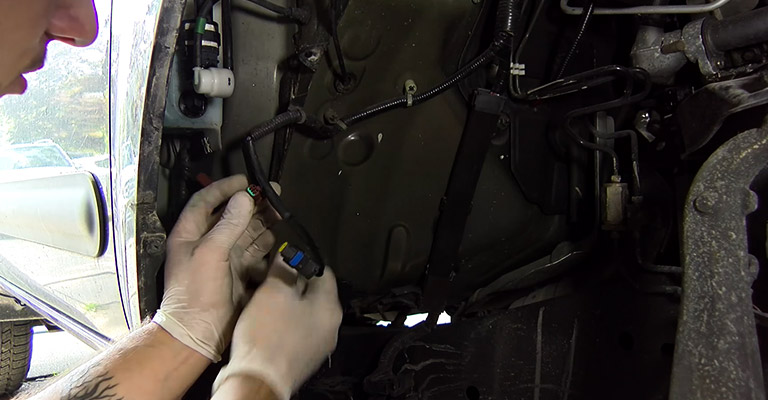
Remove the Electrical Connectors Off
Simply pull off the electrical connectors and secure them aside. Make sure that you’ve removed all the sensors and power cables. There’s a connector long behind the tank which you need to be careful with. If there is unused washer fluid in the tank, you can drain that fluid by removing the pump outlet right in front of the nozzle.

Remove the Neck
You need to stand right in front of the hood and locate the fluid inlet of the washer tank. Then remove the body clip connector of the neck by a clip remover. Pull the neck hardly upside.
Slide-Out the Tank
Again go to the wheel well assembly and remove the 10 mm bolts out by a wrench. Then support the tank by your hand. Don’t try to pull it through the assembly. Just slide the tank out. Okay, the whole process is done successfully!
When and Why to Remove Windshield Wiper Fluid Tank
Why you’ve to change the windshield wiper fluid tank is a very legit question. Some may have the misconception that any problem related to the wiper fluid is for the fluid tank. Though a fluid tank is a primal cause, it’s not always responsible for all stumbling blocks.
Washer Fluid Leak
You may have noticed a severe washer fluid leak from the bottom front portion of your vehicle. If so, this is a confirmed case of windshield washer fluid leak. In this case, you need to either replace or fix the washer reservoir.
Lack of Fluid Pressure
Another symptom is the lack of fluid pressure when necessary. You may have faced this situation when you press the button to release washer fluid, you get a minimum output. It happens due to the lack of fluid inside the reservoir. Of course, the deficit is for a leak in the reservoir.
However, don’t get confused. When you notice a lack of fluid pressure, you need to check the fluid level inside the tank. If there’s not enough fluid, pour some fluid in. Then check the fluid level again after a few days. If it’s low again, only then you can suspect a leak.
Faulty Motor
Another cause of the low pressure of the fluid is due to a faulty motor. Certainly, the motor is an integrated part of the wiper system. As the motor fails to continue sucking fluid, the pressure drastically drops. If you find the fluid level inside the tank up to the mark, even after the second check, you need to check the motor.
Conclusion
Hopefully, by now you know how to remove windshield wiper fluid tank from your Nissan frontier. But the issue of leaking washer fluid can still appear if you do not maintain certain procedures.
Though the wiper system of Nissan Frontier is extremely rugged, you need to take some minor care of it. We recommend not to pour only water inside the tank. Instead, you need to feed the tank proper washer fluid. Besides, cleaning of the wiper blade helps a lot to maximize the performance.
Also read- How to Change Windshield Wiper for 2018 Toyota 4runner?
Leave a Reply